Topics > Act Plugins > dpContactPush > FAQ ID # 117

FAQ ID # 117
Last Update : 2018/01/05
Print this FAQ

Question / Issue
dpContactPush - Client Installation

Answer / Solution
PROGRAM: dpContactPush - Client Installation
Table of Contents
dpContactPush Client Pre-Installation dpContactPush Client Installation dpContactPush Client Configuration

What you need prior to installation?
  1. Act! Premium
    If push permission is enabled for current user
  2. dpContactPush company database name and server path to database


What you need for installation?
  1. dpContactPush
  2. FILE: dpContactPush-Install.exe


DataPlus dpContactPush Client Installation
    Welcome Screen
  1. Double click file dpContactPush-Install.exe
  2. This will start the dpContactPush setup wizard.
  3. Click on Next >
    License Agreement
  1. License Agreement
  2. If you agree, click on I accept the terms in the license agreement
  3. Click on Next >
    Choose Components
  1. Check "Client Components"
  2. Check "dpContactPush"
  3. Click on Next >

    Note: Server Components are discussed later in KB.

    Choose Install Location
  1. Destination Folder
  2. Browse to the location Act! was installed
  3. Click on Install
    Installing
    Installation Complete
  1. Click on Next >
    Completing Setup Wizard
  1. Uncheck Run Client Configuration
  2. Click on Finish
    Completing Setup Wizard
  1. Check Run Client Configuration
  2. Click on Finish


dpContactPush Activation
    dpContactPush Client Activation
  1. Start
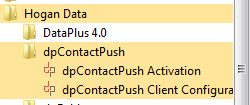
  2. All Programs/Hogan Data/dpContactPush
  3. Right click dpContactPush Client Activation
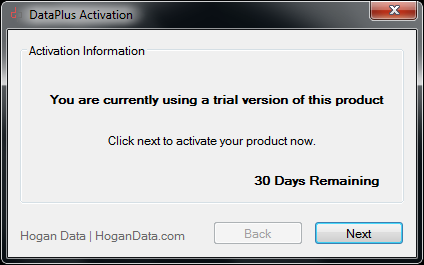
    dpContactPush Client Activation
  1. Click Next
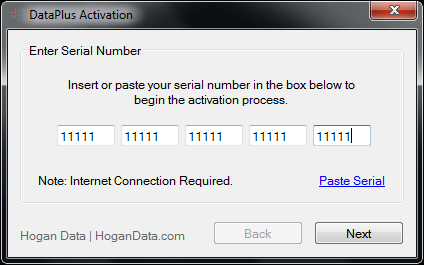
    dpContactPush Client Activation
  1. Copy your serial code from your "Client Portal"
  2. Click Paste Serial
  3. Click Next
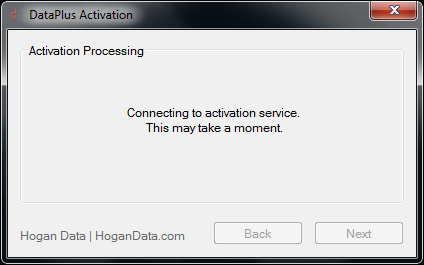
    dpContactPush Client Activation
  1. Connecting to the DataPlus registration service
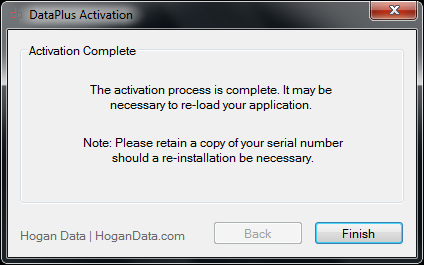
    dpContactPush Client Activation
  1. Click Finish


DataPlus dpContactPush Configuration for CSV
    Configure Contact Push
    Open Act Application
  1. From Act tool bar
  2. Tools/dpContactPush Configure Contact Push


DataPlus dpContactPush Configuration for JASON
    Configure Contact Push
    Open Act Application
  1. From Act tool bar
  2. Tools/dpContactPush Configure Contact Push


DataPlus dpContactPush Configuration for SAPOne
    Configure Contact Push
    Open Act Application
  1. From Act tool bar
  2. Tools/dpContactPush Configure Contact Push
    Configure Contact Push
    General
  1. Push Meethod: SAP One
  2. Tarket Format XML
  3. Customer Field: eCustomerID
  4. Tracking Field: Contact Push Tracking
  5. Click on Push Settings Tab
    Configure Contact Push
    Push Settings
  1. Check Contact Push Enagled

    Mapping

  2. Modify as needed
  3. Click Save
  4. Click Ok
    Configure Contact Push
    From Act tool bar
  1. Tools/DataPlus 4.0 DIsable DataPlus 4.0
  2. Are you sure you wish to disable DataPlus 4.0? Yes
  3. DataPlus 4.0 Notice OK

    Configure Contact Push
  1. From Act tool bar
  2. Tools/DataPlus 4.0 Enable DataPlus 4.0
    Configure Contact Push
    Push Contacts
  1. From tool bar
  2. Tools/dpContactPush Push Contact.. now available.

Related FAQs
dpContactPush - Contact Push

Direct Link to This FAQ
http://kb.hogandata.com/?f=117

Back to Top