| Question / Issue |
 |
| DataPlus 4.0 Sage 100 - Contact Push Configuration |
| Answer / Solution |
 |
PROGRAM: DataPlus 4.0 for Sage 100 - Push Configuration
| DataPlus 4.0 Server & Client Installation
|
Configure Contact Push
- From Act Toolbar
- Tools/Sage100/Configure Sage 100 Push
|
 |
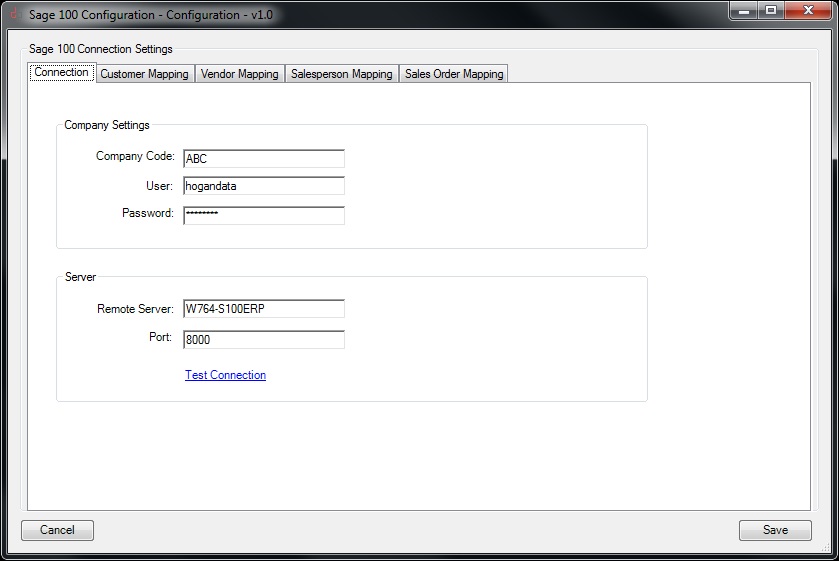
Sage 100 Connection Settings
TAB - Connection
Company Settings
- Company Code: ABC
- User: user
- Password: userpassword
Server
- Remote Server: servername or ip
- Port: 8000
- Click on Test Connection
- Click on Customer Mapping Tab
|
 |
Configure Contact Push
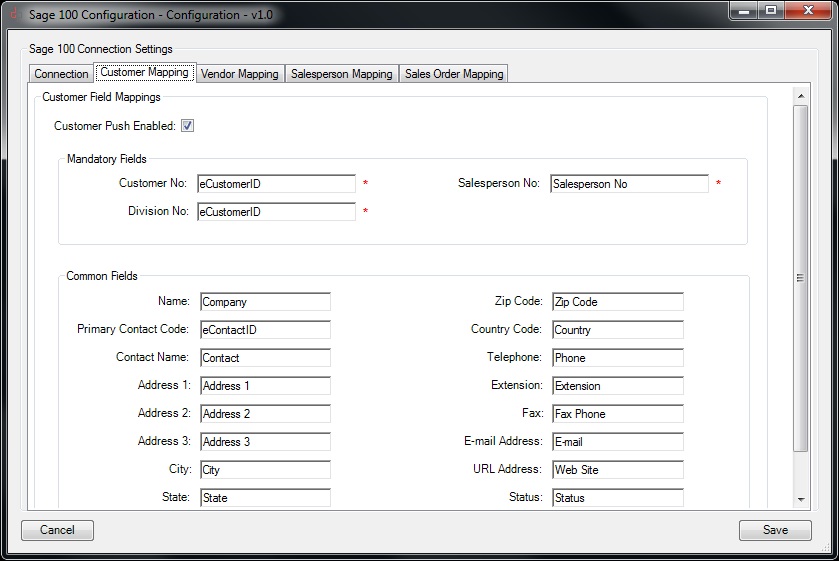
TAB - Customer Mapping
Mandatory Fields
- Customer No: eCustomerID
- Division No: eCustomerID
- Salesperson No: Salesperson No
Common Fields
- Name: Company
- Primary Contact Code: eContactID
- Contact Name: Contact
- Address 1: Address 1
- Address 2: Address 2
- City: City
- State: State
- Zip Code: Zip Code
- Country Code: Country
- Telephone: Phone
- Extension: Extension
- Fax: Fax Phone
- E-mail Address: E-Mail
- URL Address: Web Site
- Click on Customer Mapping Tab
|
 |
Configure Contact Push
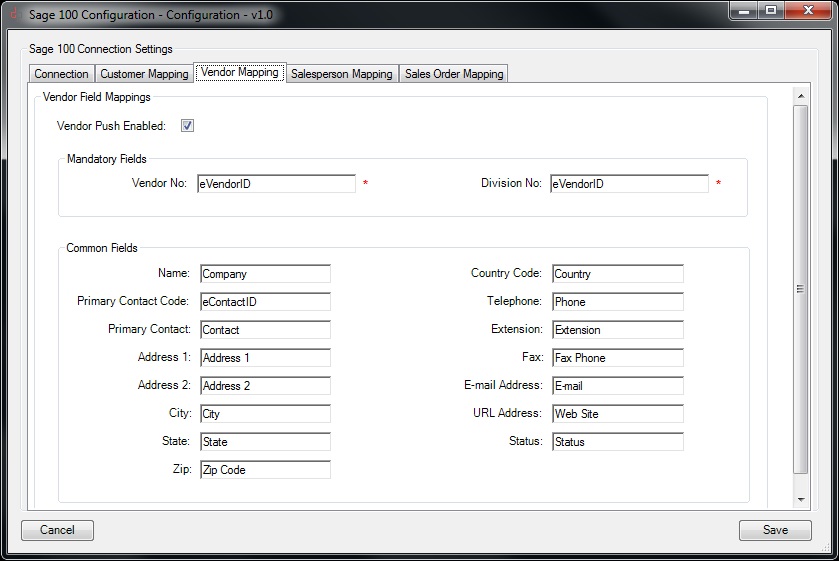
TAB - Vendor Mapping
Mandatory Fields
- Vendor No: eVendorID
- Division No: eVendorID
Common Fields
- Name: Company
- Primary Contact Code: eContactID
- Primary Contact: Contact
- Address 1: Address 1
- Address 2: Address 2
- City: City
- State: State
- Zip: Zip Code
- Country Code: Country
- Telephone: Phone
- Extension: Extension
- Fax: Fax Phone
- E-mail Address: E-Mail
- URL Address: Web Site
- Click on Salesperson Mapping Tab
|
 |
Configure Contact Push
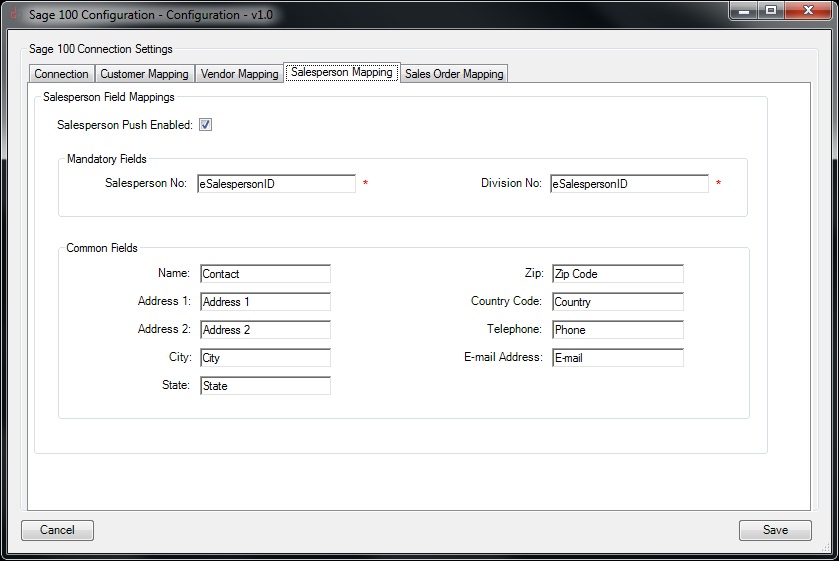
TAB - Saleperson Mapping
Mandatory Fields
- Salesperson No: eSalespersonID
- Division No: eSalespersonID
Common Fields
- Name: Contact
- Address 1: Address 1
- Address 2: Address 2
- City: City
- State: State
- Zip: Zip Code
- Country Code: Country
- Telephone: Phone
- E-mail Address: E-Mail
- Click on Save
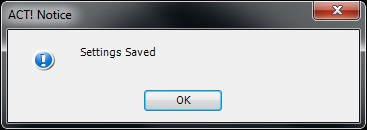
- Click on OK
- Exit Act and reopen (or go to next step for managing permissions)
|
 |
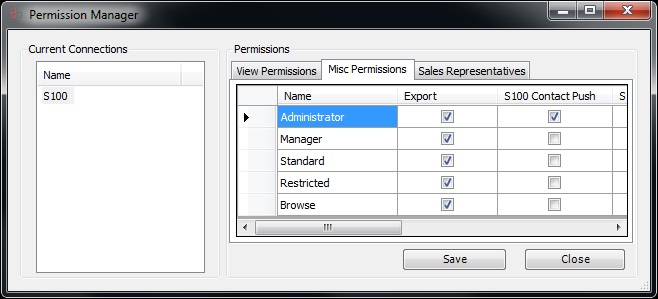
Permissions Manager
- Ensure that S100 Contact Push is Checked to allow Act user type to be able to push
- Exit Act and reopen
|
 |
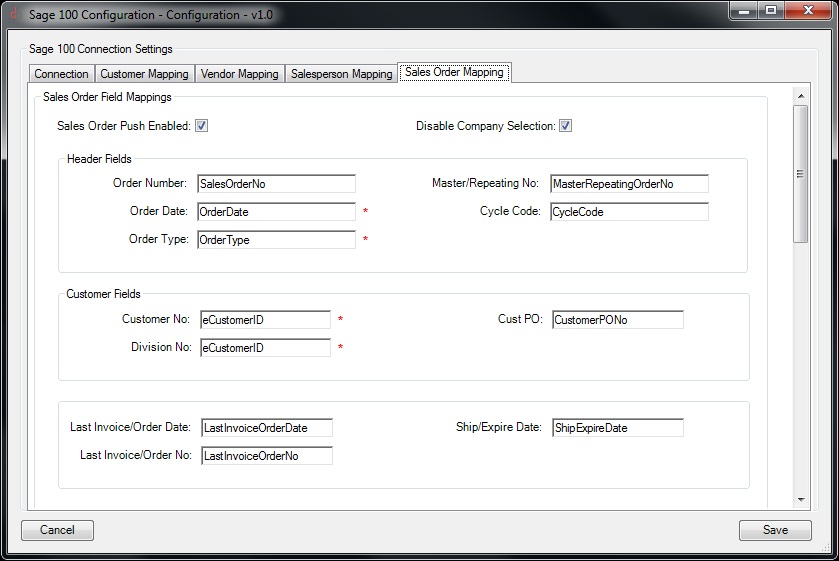
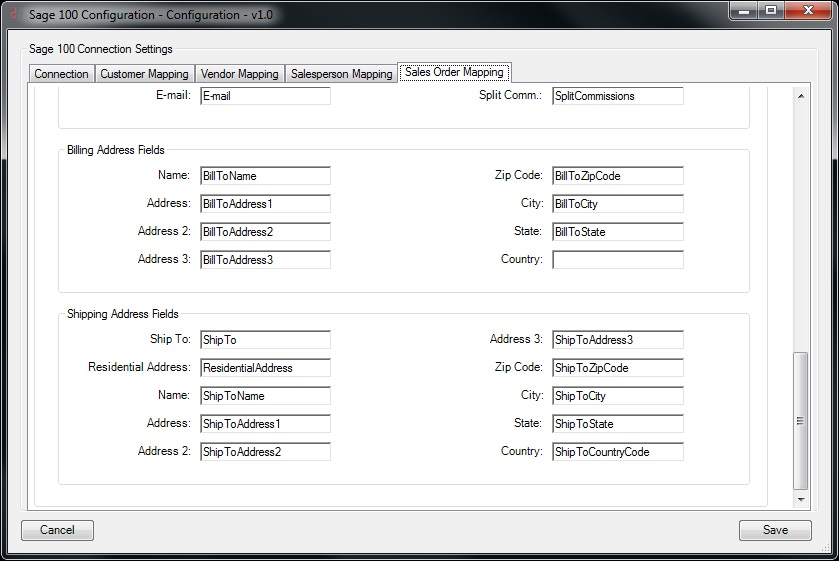
Configure Sales Order Push Enable Push
- Check Sales Order Push Enabled
- Check Disable Company Selection (if you are only using 1 Sage company)
- Uncheck Disable Company Selection (if you are using more than 1 Sage company)
Header Fields
Customer Fields |
 |
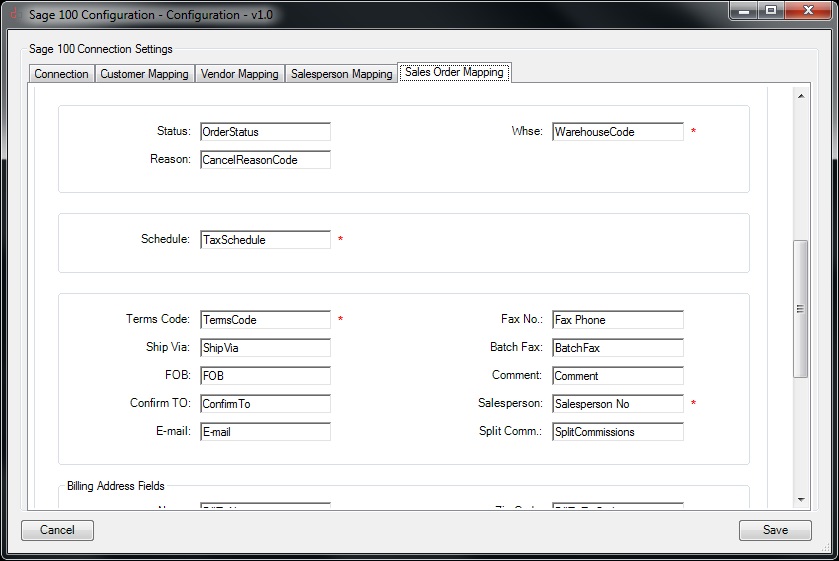
Configure Sales Order Push
Customer Fields |
 |
Configure Contact Push
Billing Addr Fields
Shipping Addr Fields |
 |
Sage 100 Contact Push
Customer | Vendor | Salesperson
- Division
- Followed by dash
- Followed by code
Customer Contact | Vendor Contact
- Division
- Followed by dash
- Followed by code
- Followed by dash
- Followed by contact code
|
| Type |
Customer |
Customer Contact |
Vendor |
Vendor Contact |
Salesperson |
| Number |
DIV-CODE |
DIV-CODE-CODE |
DIV-CODE |
DIV-CODE-CODE |
DIV-CODE |
| Characters Default |
(2)-(7) |
(2)-(7)-(10) |
(2)-(7) |
(2)-(7)-(10) |
(2)-(7) |
| Characters Custom |
(2)-(20) |
(2)-(20)-(10) |
N/A |
N/A |
N/A |
| Note: Characters Custom |
"Allow Entry of Expanded Customer Numbers" (Accounts Receivable Options/Main)
If this check box is checked, the customer number will increase the length to 20 characters.
You will need to increase the width of Act fields to accommodate the custom field length. Company Level: Customer No, eCustomerID, eLocationID. Contact Level: Customer No, eCustomerID, eLocationID, Contact No, eContactID. |
| Sample |
01-ABC |
01-ABC-CFH |
01-BANK |
01-BANK-CBH |
01-MBH |
| After successful push the following Act default fields will be updated |
| Field |
Customer No
eCustomerID |
Contact No
eContactID |
Vendor No
eVendorID |
Contact No
eContactID |
Saleperson
No eSalespersonID | | |