| Question / Issue |
 |
| DataPlus 3.0 QuickBooks - Server Installation |
| Answer / Solution |
|
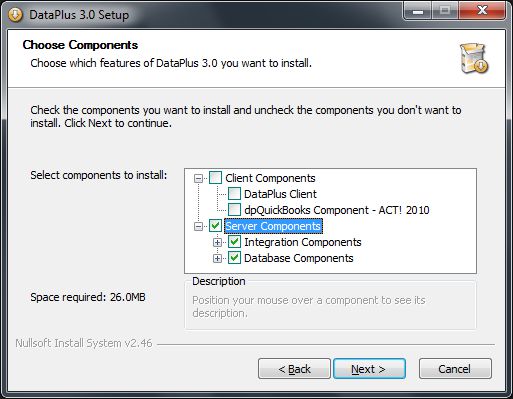
PROGRAM: DataPlus 3.0 for QuickBooks - Server Installation
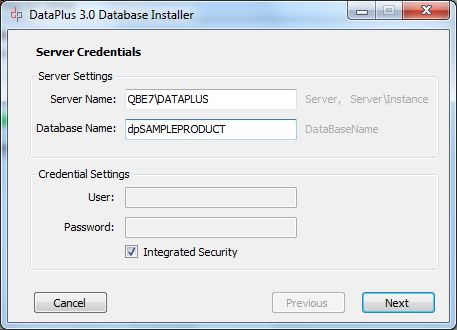
- MS SQL Server or MS SQL Express instance
- SQL 2008 Microsoft Download
- SQL 2005 Microsoft Download
- SQL Server Management Studio
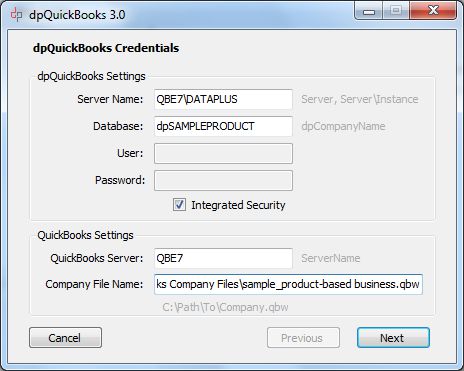
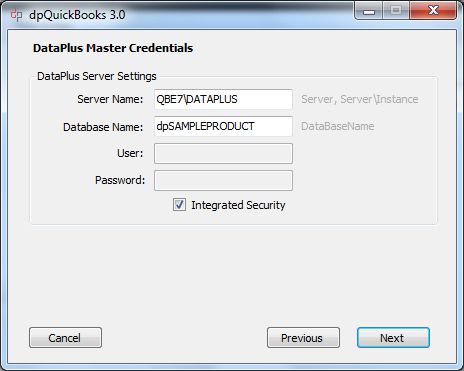
- QuickBooks Note: DataPlus for QuickBooks 3.0 must be installed on same SQL instance that QuickBooks is installed on.
- SQL security permissions
- DataPlus for QuickBooks
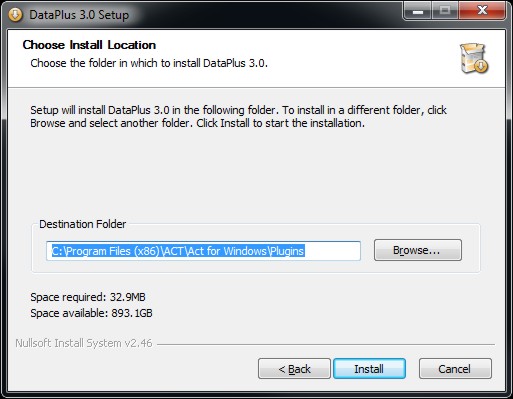
- FILE: DataPlus-QB-Install.exe
- This installer will install the necessary DataPlus SQL databases
- 10 minutes - Documentation Review
- 10 minutes - Approximant Time for Server Installation
- 2 minutes - Approximant Time for Server Configuration
- 22 minutes - Total Approximant Time for Server Installation & Configuration
| DataPlus 3.0 Server & Client Installation
|
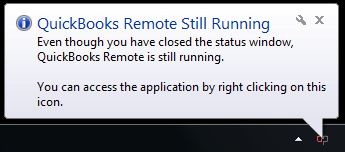
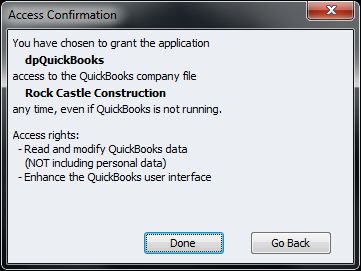
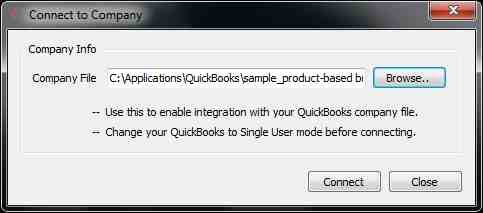
QuickBooks Remote
QuickBooks Harvester
Configure Automated Processes
|
Import QuickBooks Data
Configure DataPlus
Configure QuickBooks Push
|
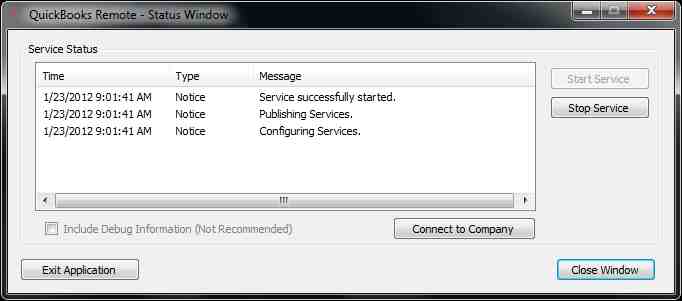
Start QuickBooks Harvester
- Click on Start/All Programs/Hogan Data/dpQuickBooks/QuickBooks Harvester
- QuickBooks Remote Started
|
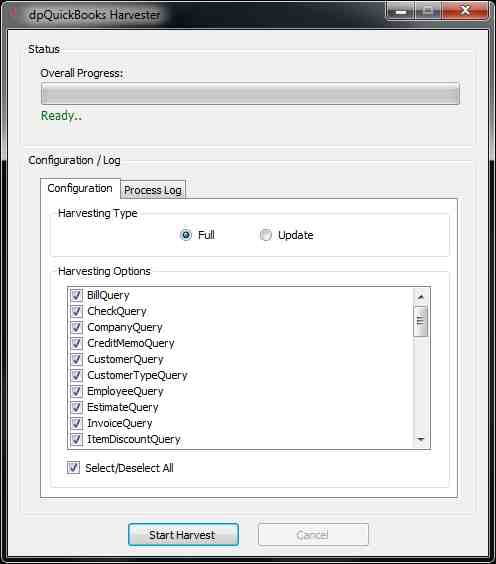 |
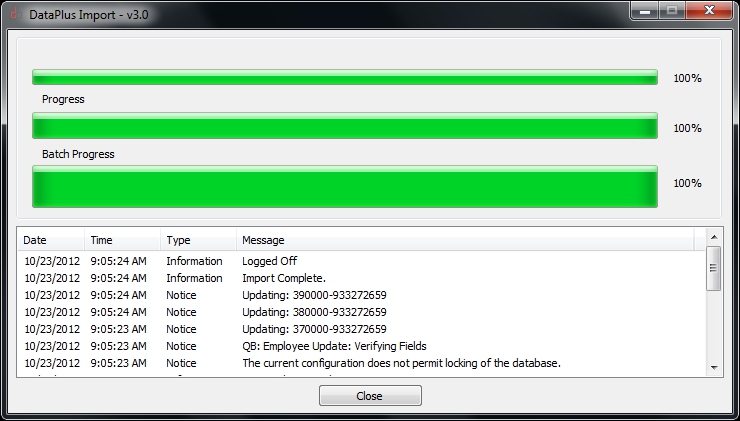
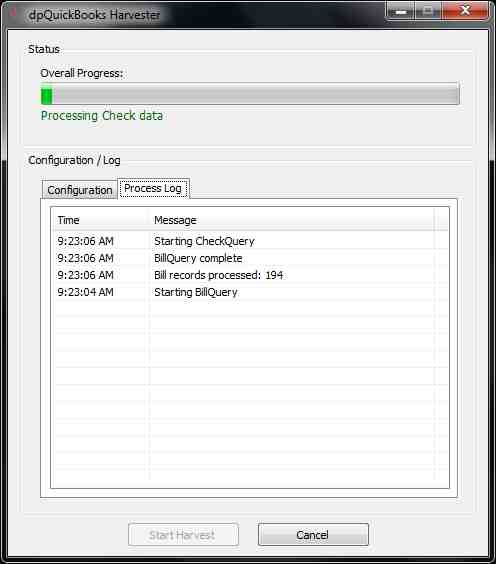
Open Status Window
- Right click "dp" icon on task bar and choose Open Status Window
- Click on Start Harvest
|
 |
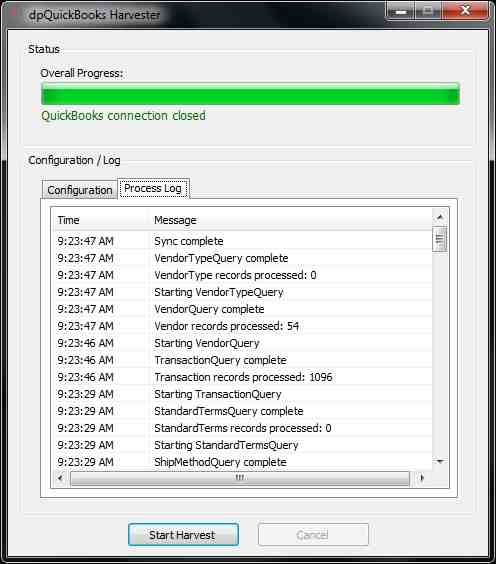
Open Status Window
- Right click "dp" icon on task bar and choose Open Status Window
- Click on Window dialog box X to close Harvester
|
 |
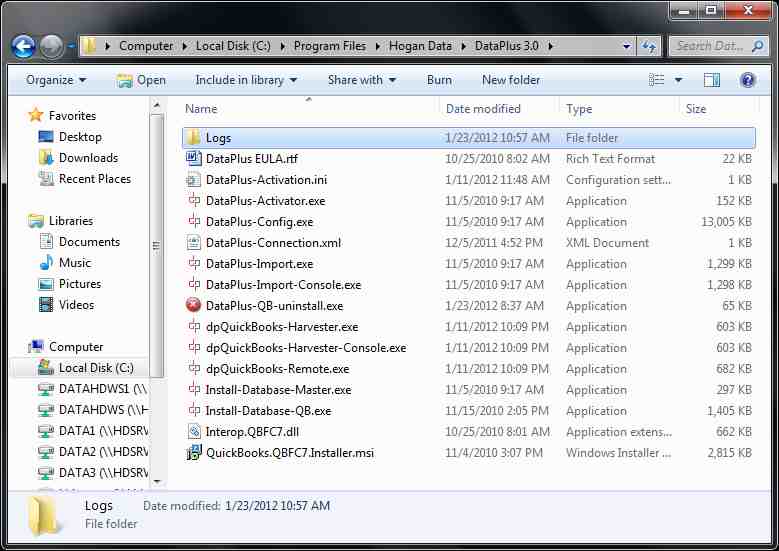
Create "Logs" folder
- In Windows, browse to:
C:\Program Files\Hogan Data\DataPlus 3.0
or
C:\Program Files (x86)\Hogan Data\DataPlus 3.0
- Create Folder Logs
|
 |
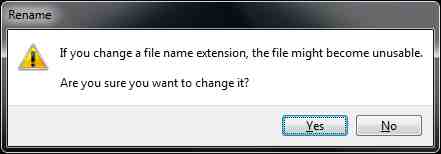
Create "BAT" files
- Create Text document Import-QB.txt
- Change txt extension to bat
- Click Yes to allow change
|
 |
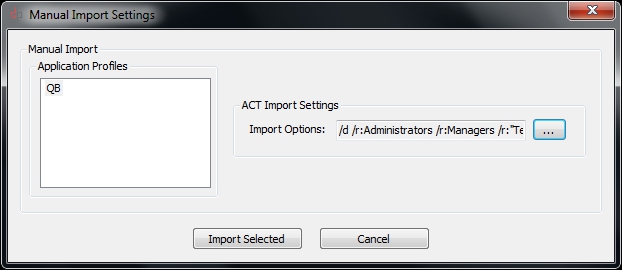
Configure DataPlus Auto Import
- Click on Start/All Programs/Hogan Data/DataPlus 3.0/DataPlus 3.0 Server Configuration
- Click on Configure Applications >>
|
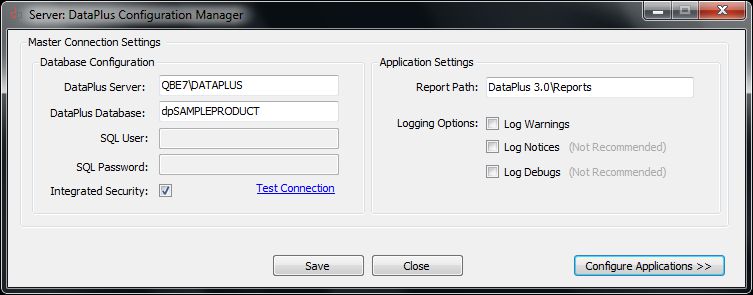 |
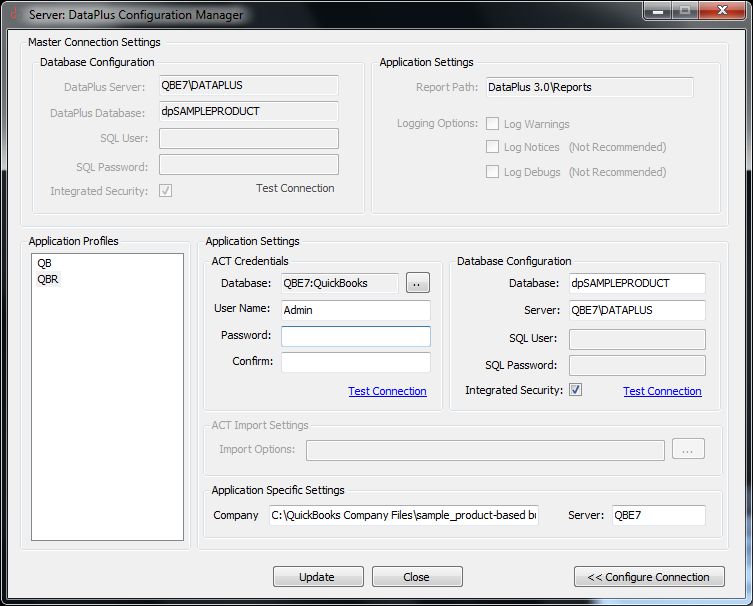
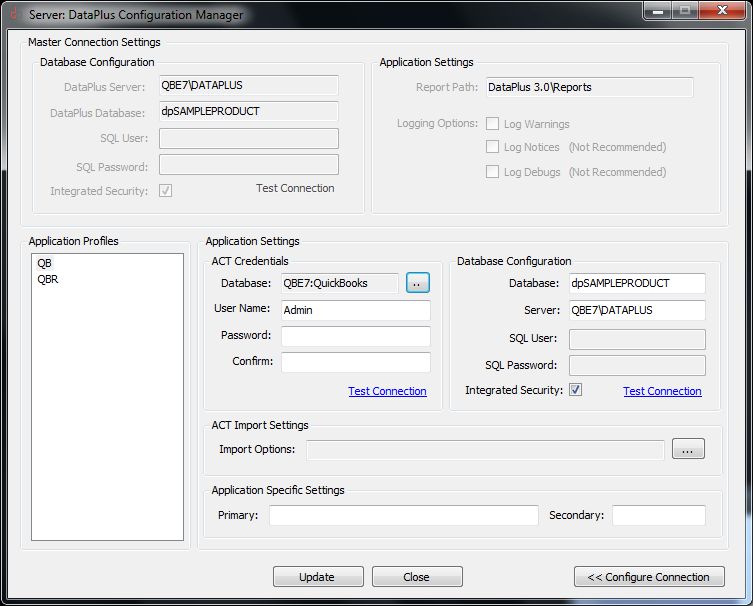
Master Connection Settings
Application Profile
- Click QB
ACT Import Settings
- Click on "Import Options:" [ ... ]
|
 |
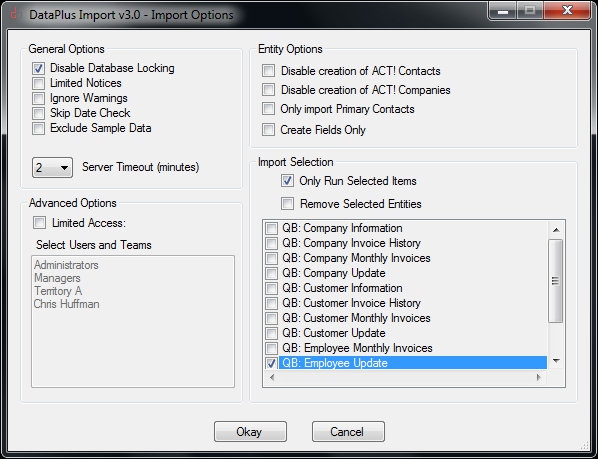
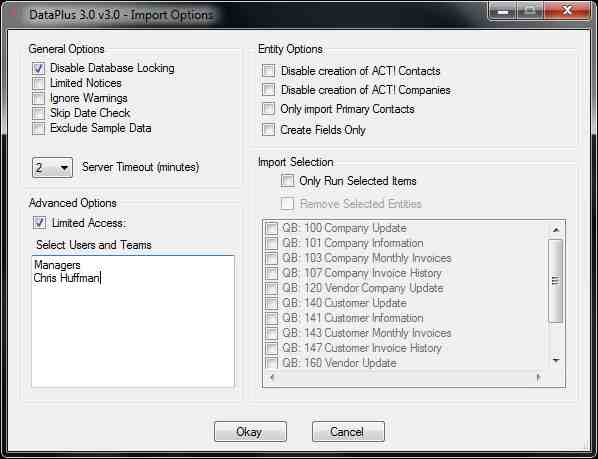
Import Options
General Options
- Check Disable Database Locking
- UnCheck Limited Notices
- UnCheck Ignore Warnings
- UnCheck Skip Date Check
- UnCheck Exclude Sample Data
- Click on 2 to change Server Timeout (minutes) if more time is needed to perform SQL connection
Entity Options
- UnCheck Disable creation of ACT! Contacts
- UnCheck Disable creation of ACT! Companies
- UnCheck Only import Primary Contacts
- UnCheck Create fields Only
Advanced Options
- Check Limited Access if you are using Limited Access in your ACT! database
- Type User/Team in open dialog box for entities to have access to imported contacts
Import Selection
- UnCheck Only Run Selected Items
- Click Okay
|
 |
DataPlus Configuration Manager
Application Profiles
- Click Update
- Right click on QB
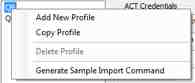
- Click on Generate Sample Import Command
|
|
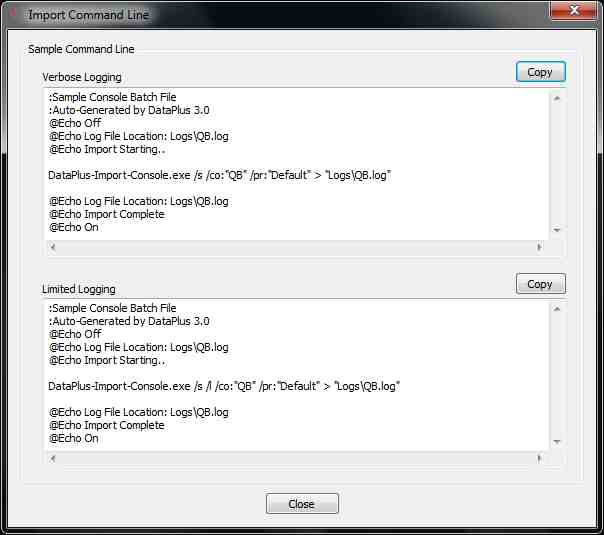
Sample Command Line
- Logs entire line details (We recommend "Verbose Logging")
Verbose Logging
- Click on Copy
- Click on Close
Or
Limited Logging
- Log summary details
- Click on Copy
- Click on Close
|
 |
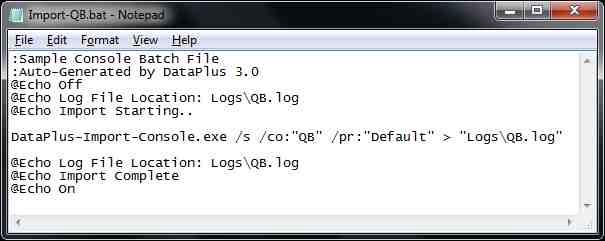
Edit Import-QB.bat
- In Windows, browse to:
C:\Program Files\Hogan Data\DataPlus 3.0
or
C:\Program Files (x86)\Hogan Data\DataPlus 3.0
- Right click on Import-QB.bat
- Click Edit
- Right click Paste
IMPORTANT
- Change DataPlus-Import-Console.exe path to FULL PATH within Quotes(")
"C:\Program Files\Hogan Data\DataPlus 3.0\DataPlus-Import-Console.exe"
- Change Logs path to FULL PATH within Quotes(")
"C:\Program Files\Hogan Data\DataPlus 3.0\Logs\QB.log"
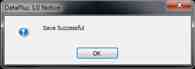
- Save file File/Save
- Open Microsoft Scheduler and schedule time to execute the "Import-QB.bat" file.
|
 |
Schedule Harvester Console
Full Import
- Open Microsoft Scheduler and schedule time to execute the "dpQuickBooks-Harvester-Console.exe" file.
Update Import
- In Windows, browse to:
C:\Program Files\Hogan Data\DataPlus 3.0
or
C:\Program Files (x86)\Hogan Data\DataPlus 3.0
- Right click dpQuickBooks-Harvester-Console.exe Create shortcut
- Change name to dpQuickBooks-Harvester-ConsoleUpdate.exe
- Right click dpQuickBooks-Harvester-ConsoleUpdate.exe Properties
- Add space and /u at the end of "Target"
- Open Microsoft Scheduler and schedule time to execute the "dpQuickBooks-Harvester-ConsoleUpdate.exe" file.
|
DataPlus Configuration
- Open ACT
- Click on Menu Tools/DataPlus 3.0 Manage Permissions
Permission Manager
- Click on QuickBooks
View Permissions
- Double click Administrator header
- Double click Manager header
- Check View name under Standard
- Check View name under Restricted
- Check View name under Browse
Note: Each checked view will enable ACT! user to view the menu item in DataPlus tab.
- Click on Tab Misc Permissions
|
 |
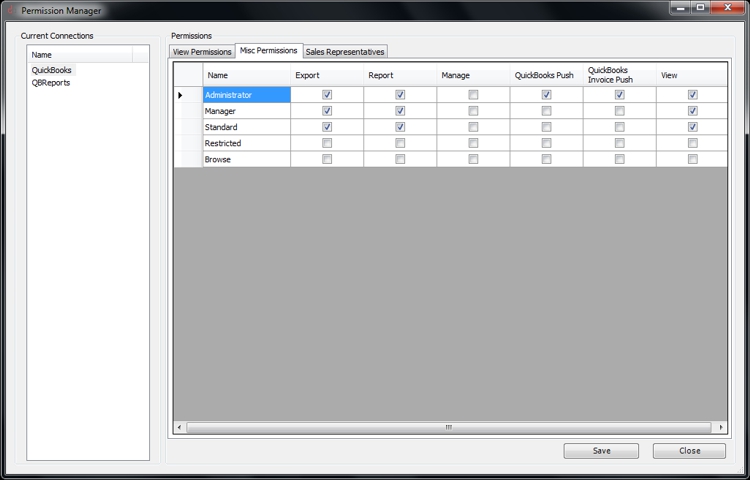
DataPlus Configuration
Permission Manager
Misc Permissions
- Check appropriate column for each ACT! User
- Export (export to excel)
- Report (Crystal Report)
- Manage (Ignore, leave unchecked)
- QuickBooks Push (Push ACT! contact to QuickBooks)
- QuickBooks Invoice Push (Create invoice in QuickBooks)
- View (view menu items in DataPlus tab)
- Click on Tab Misc Permissions
|
 |
|
|
 |
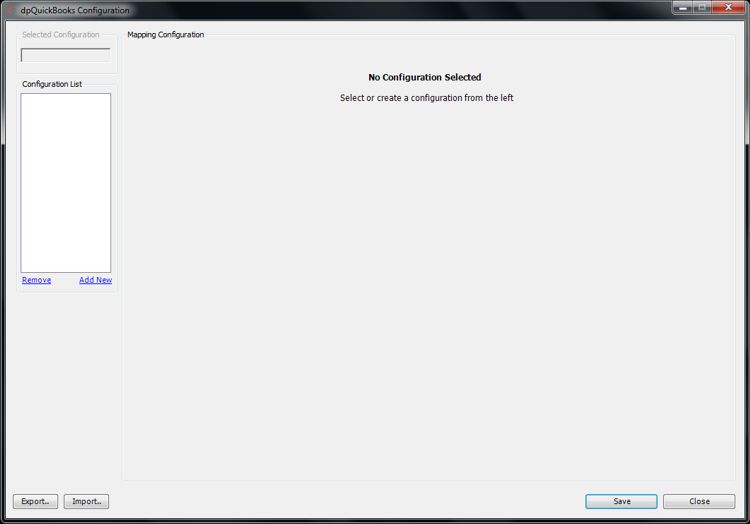
dpQuickBooks Configuration
- Open ACT
- Click on Menu Tools/dpQuickBooks Configure Quickbooks Push
Configuration List
- Click on Add New
|
 |
dpQuickBooks Configuration
Configuration List
- Click on New Configuration 1
Selected Configuration
- Click on New Configuration 1
- Change text from New Configuration 1 to Contact Mapping
|
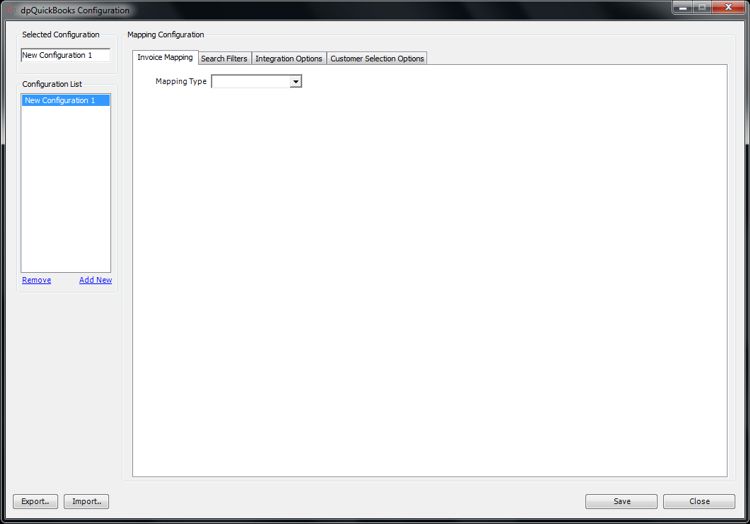 |
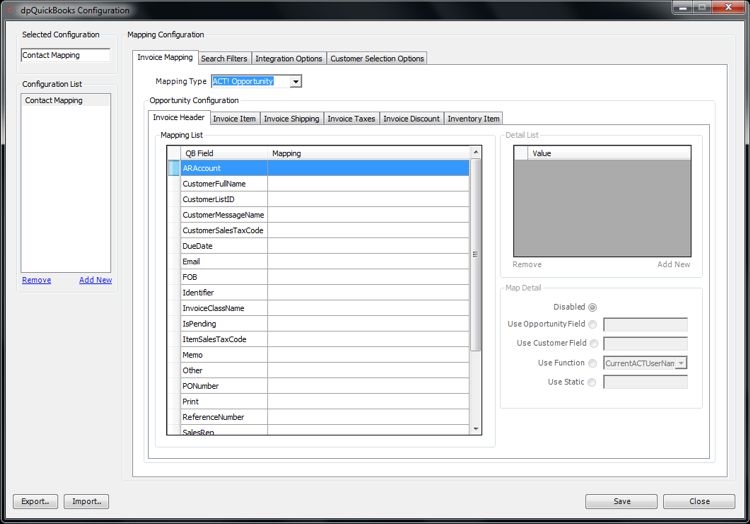
dpQuickBooks Configuration
Invoice Mapping
- Click Mapping Type ACT! Opportunity
|
 |
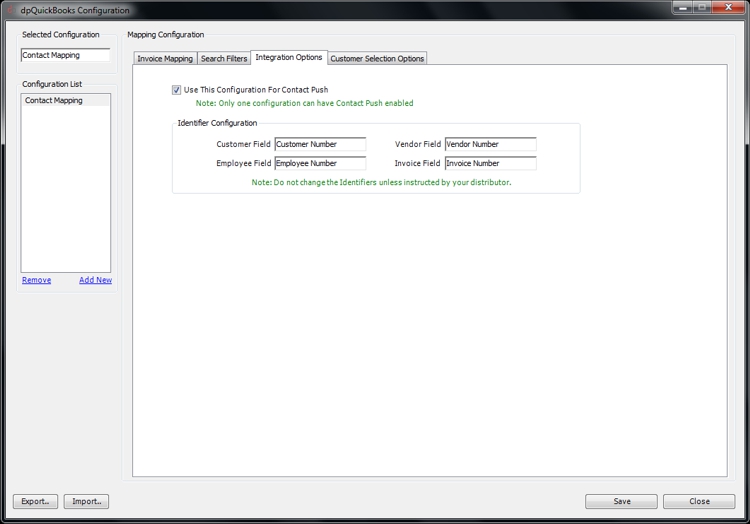
dpQuickBooks Configuration
Integration Options
- Click Tab Integration Options
|
 |
|
|
 |
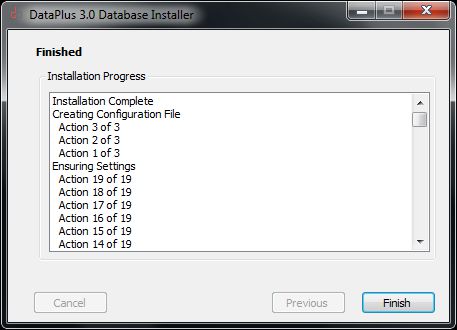
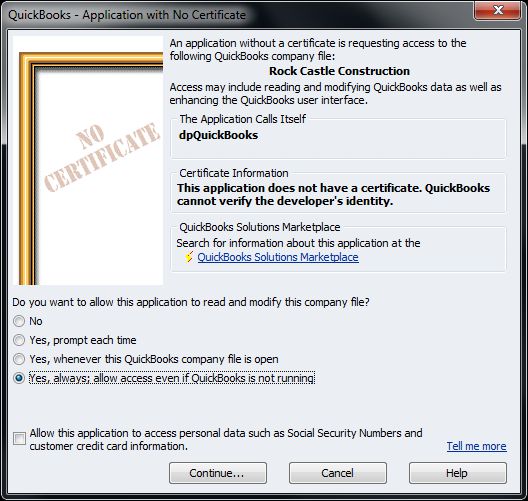
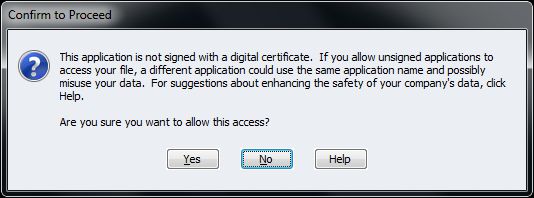
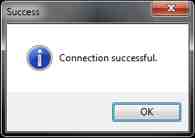
Installation, configuration, and connection to your QuickBooks application is complete. |