FAQ ID # 4
Last Update : 2019/04/19
Print this FAQ

Question / Issue
dpHistory - Configuration

Answer / Solution
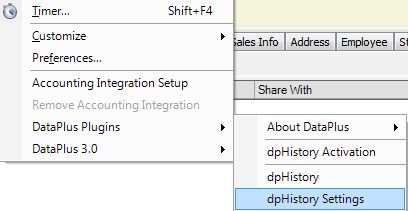
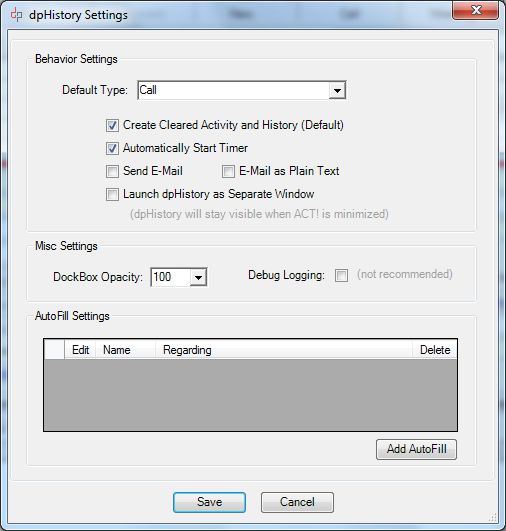
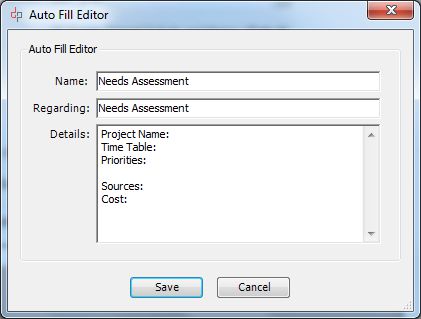
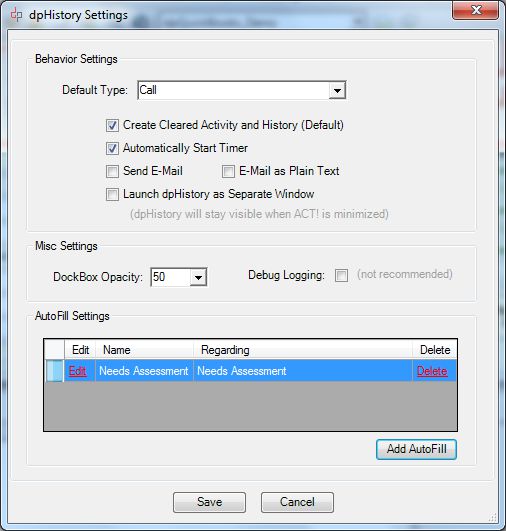
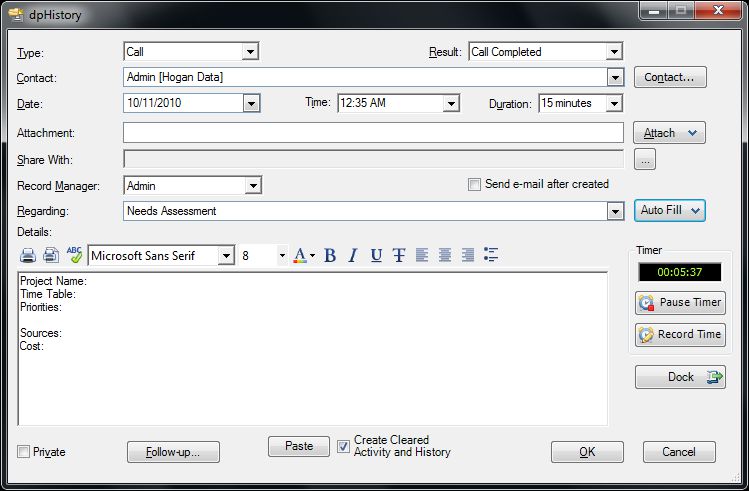
PROGRAM: dpHistory Configuration
What you need prior to configuration.
  1. dpHistory installed

    If you are upgrading dpHistory

  2. Browse to: %AppData%\Hogan Data\dpHistory 1.3
  3. After new installation, and opening Act, a new folder will appear %AppData%\Hogan Data\dpHistory 4.0
  4. Copy: %AppData%\Hogan Data\dpHistory 1.3\dpHistorySetting.xml to: %AppData%\Hogan Data\dpHistory 4.0


dpHistory - Client Configuration
    dpHistory Settings
  1. Open Act!
  2. Click on Tools
  3. DataPlus Plugins
  4. Browse and choose dpHistory settings
    Behavior Settings
  1. Default Type: ChooseType (Activity Type)
  2. Choose Create Cleared Activity and History (Default)
  3. Choose Automatically Start Timer
  4. Choose Send E-Mail
  5. Choose E-Mail as Plain Text (If you're not using Outlook)
  6. Launch dpHistory as Separate Window (dpHistory will stay visible when ACT! is minimized)
  7. Click on Next >

    Misc Settings

  8. DockBoxOpacity: 100
  9. DockBoxOpacity: 50
    AutoFill Editor
  1. Click on Add AutoFill
    Sample Data
  2. Name: Needs Assessment
  3. Regarding: Needs Assessment
  4. Details:
    Project Name:
    Time Table:
    Priorities:
    Sources:
    Cost:
  5. Click on Save
    Saved AutoFill
  1. Click on Save
    Launch dpHistory
  1. Click on dpHistory Icon
  2. Click on AutoFill
  3. Choose Needs Assessment

    Complete Phone Call

  4. Click on OK
  5. dpHistory will then
    • Create an ACT! Activity
    • Clear the ACT! Activity
    • Create an ACT! History
  6. You can create as many AutoFill setting as you want.

Related FAQs
dpHistory - Client Installation

Direct Link to This FAQ
http://kb.hogandata.com/?f=4

Back to Top