| Question / Issue |
 |
| DataPlus 4.0 QuickBooks - Harvester |
| Answer / Solution |
|
PROGRAM: DataPlus QuickBooks - Harvester
Start QuickBooks Harvester
- Click on Start/All Programs/Hogan Data/dpQuickBooks/QuickBooks Harvester
- QuickBooks Remote Started
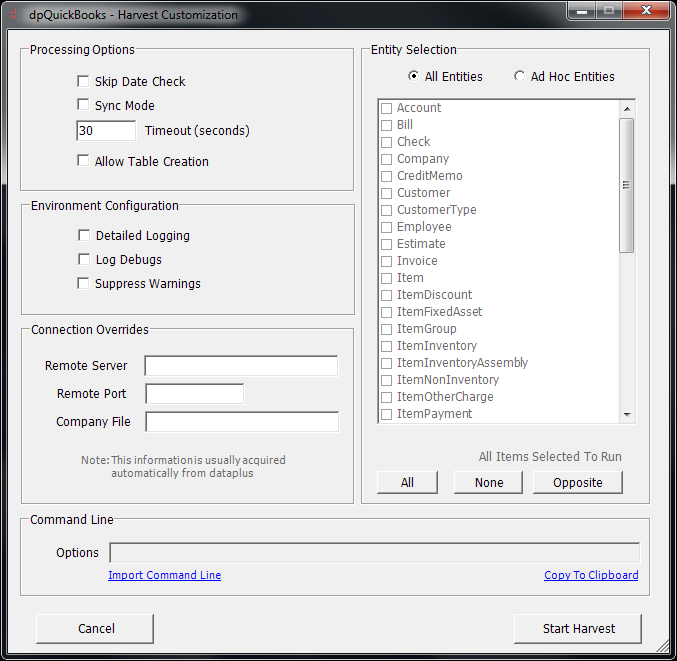
Processing Options
- Skip Date Check
- Sync Mode
- Timeout (seconds)
- Allow Table Creation
Environment Configuration
- Detailed Logging
- Log Bugs
- Suppress Warnings
Entity Selection
- All Entities
- Ad Hoc Entities
- Entities
- Click on All
- Click on None
- Click on Opposite
Connection Overides Go to
- Remote Server QBServerName
- Remote Port 3790
- Company File path to your QB Company and name
Command Line
- Options
- Import Command Line
- Copy To Clipboard
|
 |
Harvester Customization
- Click on Start/All Programs/Hogan Data/dpQuickBooks/QuickBooks Harvester
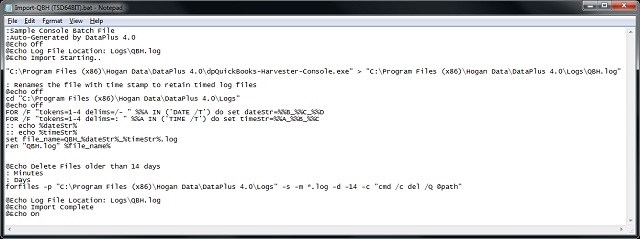
Command Line
- The command line is used for creating batch files to execute manually or through Microsoft Task Scheduler.
- Open Windows Browser to: C:\Program Files (x86)\Hogan Data\DataPlus 4.0\
- Sample batch file: Import-QBH (TSD64BIT).bat
- Edit Import-QBH (TSD64BIT).bat in notepad
|
|
Harvester Customization
- Default command line: "C:\Program Files (x86)\Hogan Data\DataPlus 4.0\dpQuickBooks-Harvester-Console.exe"
|
Click for enlarged image.
|
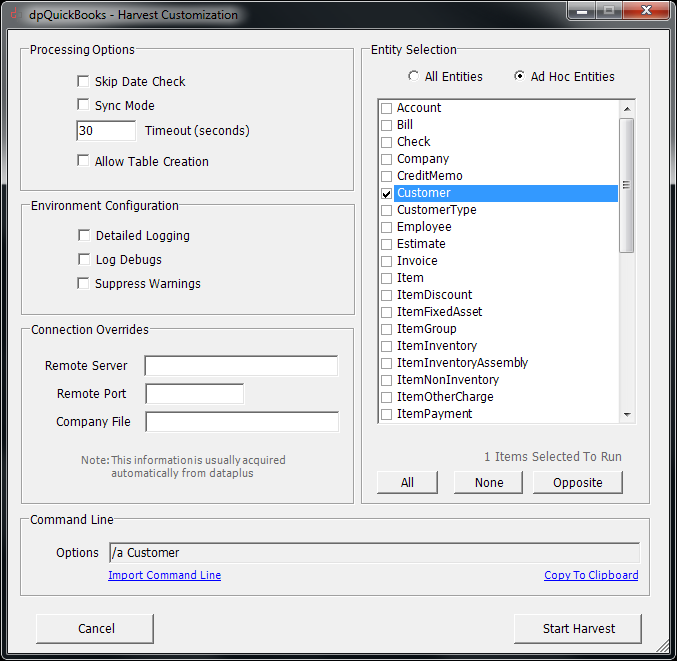
Harvester Customization
- In harvester configuration Click on Ad Hoc Entities under Entity Selection
- Options now display /a Customer
- Click on Copy To Clipboard
- Open batch file and paste /a Customer after command line
- Sample:
- You can create multiple batch files with "Command Lines"
- e.g. Import-QBH_Customer.bat
- e.g. If you chose Customer and Invoice command line would be /a Customer Invoice and batch file could be Import-QBH_Customer_Invoice.bat
|
 |
Start QuickBooks Harvester
- Click on Start/All Programs/Hogan Data/dpQuickBooks/QuickBooks Harvester
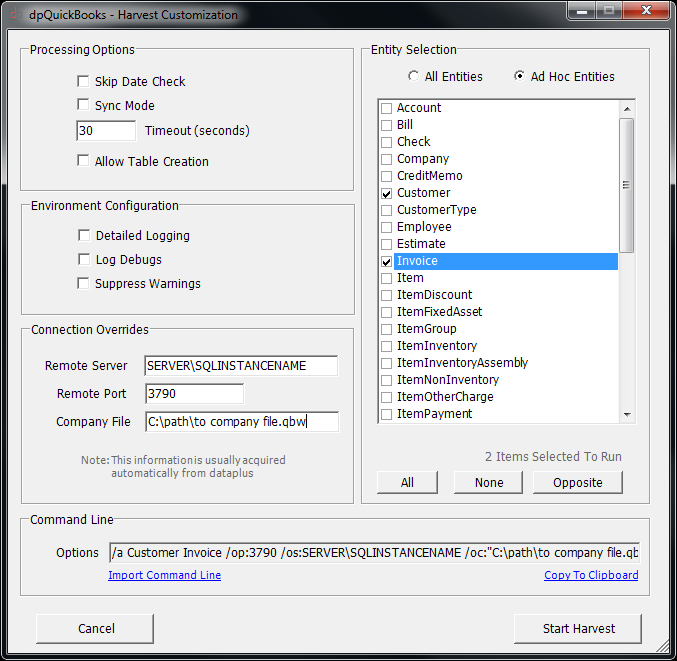
Connection Overrides
- Remote Server SERVER\SQLINSTANCENAME
- Remote Port 3790
- Company File C:\path\to company file.qbw
- Take notice of options under "Command Line". It displays
- You can copy this command line to a custom batch file for manual or automated execution using Microsoft Task Manager
|
 | |